
Workspaces

Create workspaces, switch between them, invite your team and follow usage.
A workspace holds your agents, your team, usage, and billing. Each workspace has its own members and roles, so you can belong to several, for example one per brand, with a different role in each. Each workspace also has its own plan and credit balances. Subscriptions, purchased credits, and member allowances are not shared between workspaces. Owners manage them under Workspace settings → Plans.

Your first workspace

Signing up with a new account creates your first workspace, and you become its primary owner. Setup then walks you through your first agent. You can rename the workspace in Workspace settings. An empty workspace includes explorable sample tickets in Helpdesk inbox and sample charts on Home and Dashboards. A banner identifies the fictional data. You can change sample tickets and try replies without sending anything. Choose Hide sample data to dismiss the examples in your browser, or start using the workspace and real activity will replace them automatically. Owners can also add a workspace image to display in the workspace menu and invitation emails. Owners and members can create API keys under Workspace settings → API keys to call the Developer API from their own backend. If a teammate invited you, open the invitation and sign up with the invited email address. You join their workspace without going through setup. See Accept an invitation.

Find your way around

Click the Centillion Labs logo at the top of the left rail to return to your workspace. When the rail folds to icons, the logo’s name hides and its mark stays visible in the same place. The sidebar changes when you enter an agent. In the workspace, Home shows shared performance reports. Agents opens the searchable agent directory. Helpdesk inbox, Conversations, Knowledge base, Tools and Tests are pinned by default. Open More for Evaluations, listed first, followed by Dashboards, Integrations, Voices, Contacts, Channels, Outbound and Usage. Hover over a page and click its pin to add it to the sidebar. Click a pinned page’s pin again to move it back to More. These choices are saved for your account and workspace in this browser. Workspace and agent pages have separate pin lists. Dismiss the pin tip with its × button; it stays dismissed.
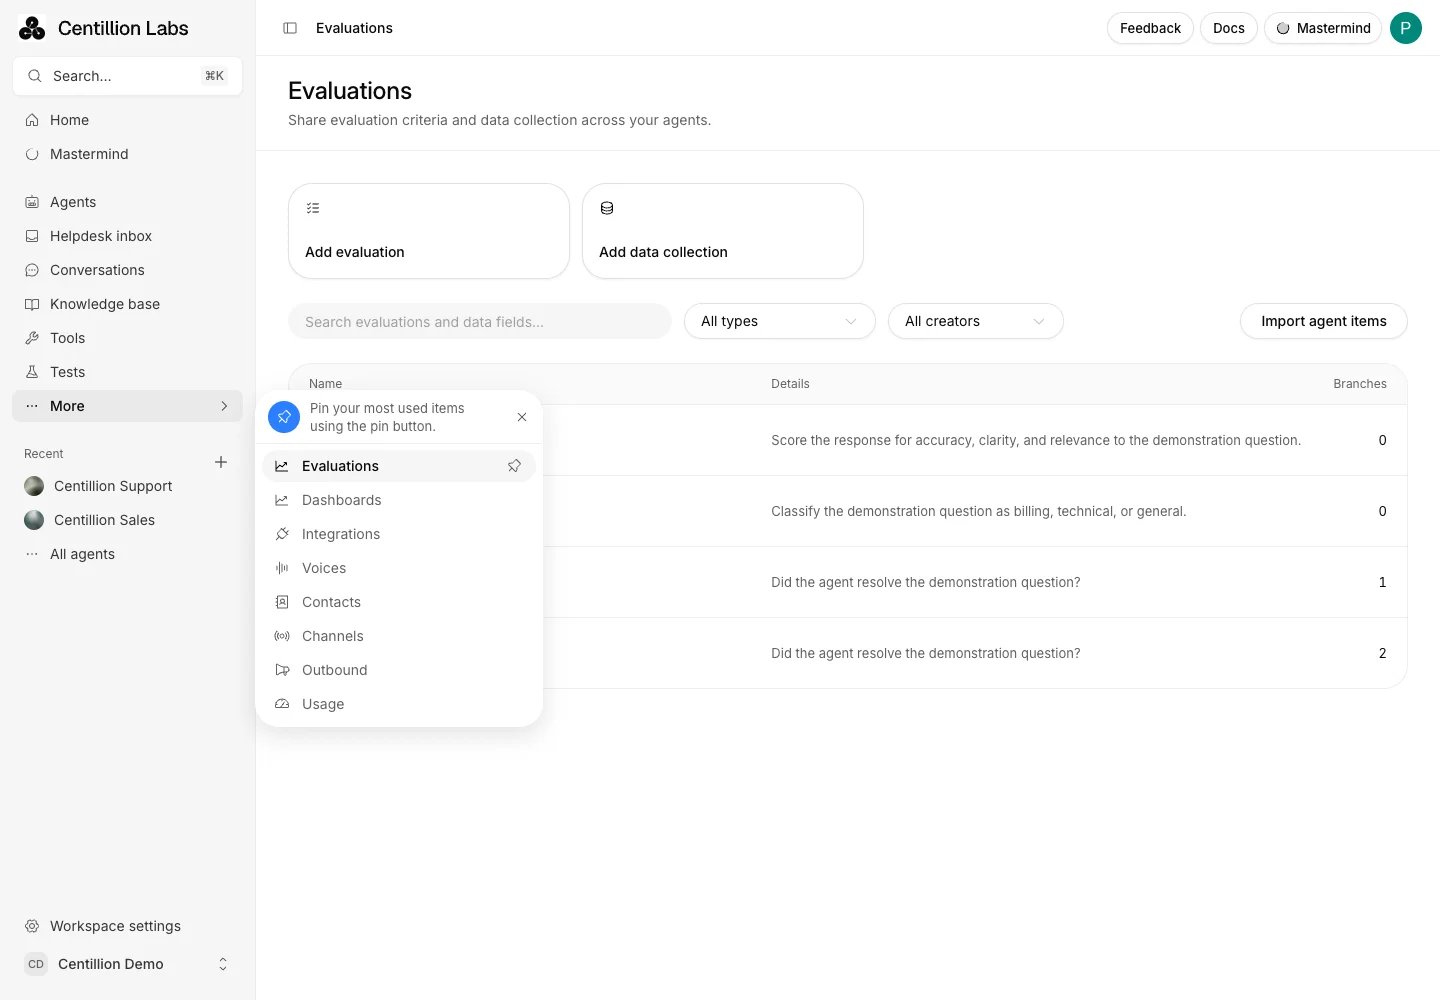
Centillion Labs workspace sidebar with Evaluations first in More and the shared analysis library open

Evaluations opens the shared analysis library. More holds the pages you have not pinned to the sidebar.

With no favorite agents, Recent gives you quick access to your agents, with recently opened agents first. Hover over an agent and click its pin: the section becomes Favorites and shows only your pinned agents, in the order you pinned them. Unpinning the last favorite brings Recent back. Favorite agents follow you to any device. Under Recent, All agents opens a searchable switcher with each agent’s conversation count for the last 30 days. Owners and Members can create an agent with + beside Recent. The Agents page remains available to open or create other agents while Favorites is shown. Workspace Knowledge base and Tools manage shared resources. Evaluations opens the shared analysis library for success criteria and data points that can be attached to agent branches. Conversations lists conversations across your agents. Dashboards uses the same reports as Home, with an Agent filter. Tests opens the shared test library and run history. Open More → Channels to reach phone, messaging and website channels. Channels → Phone holds workspace phone numbers and their assigned agents. Inside an agent, Channels → Phone shows that agent’s numbers. Add number lets you choose an available workspace number or import one. Messaging accounts remain accessible from Channels without separate sidebar entries. Inside an agent, Back to workspace, the agent switcher and the pin control stay above the navigation. The version control branch row under the agent switcher shows the branch you are editing. Pulse, Mastermind and Helpdesk inbox stay at the top. The agent’s configuration, knowledge, evaluations, tools, procedures, workflow, channels and conversations are pinned by default. Open More for Dashboards, Version control, Guardrails, Integrations, Tests, Contacts and Outbound. Agent settings stays at the foot of the sidebar. Opening an agent lands on Pulse, with its activity summary and charts. Choose Preview in the top bar to open voice or chat on the right. It starts closed and keeps your open or closed choice as you navigate between agent pages. On phones and tablets, Preview opens as a sheet. The channel Playground remains under Agent → Playground. At the foot of either sidebar is the workspace menu. The bar above the page names the current agent and page. Its sidebar button folds the sidebar to icons on desktop and opens a drawer on mobile. Feedback, Docs and your account menu sit on the right, alongside Preview and Mastermind when you are inside an agent. Publish there saves your edits as a new version of the branch. Opening a conversation replaces the top bar with its review toolbar. Use the arrows to move between conversations or close the review to return to the list. On mobile, Transcript and Details switch between the two panels. Your account menu, under your picture at the far right, opens Manage account, Theme and Sign out. Under Theme, choose Light, Dark or System; a check marks the one in use.

Switch workspaces

  1. At the foot of the left rail, open the menu that shows your workspace’s name.
  2. Open Switch workspace and choose a workspace.
The same menu opens Usage and Workspace settings, and lets an Owner invite teammates. The workspace you chose opens on Home. A workspace you created that has no agent yet can open on setup instead. In Helpdesk, open the agent and workspace menu and use the switcher under Switch workspace. A link to a page in another workspace, such as an agent a teammate shares, switches you to that workspace when you open it. If you are not a member of that workspace, the page is not found. If you switch workspaces in another browser tab, a change saved in this tab can fail with “This workspace is not active. Switch workspaces and try again.” Reloading the page makes this workspace active again but clears unsaved edits, so copy what you typed before you reload, then make the change again.

Create another workspace

Open the workspace switcher as above and choose Create workspace. Enter a name and confirm. You become the primary owner of the new workspace. A new workspace starts empty. Agents, members, usage, and billing stay in the workspace where they were created, so create the agent and invite the team in the new one.

Leave or delete a workspace

To leave, open Workspace settings → Members and choose Leave workspace from your own row. The primary owner has to transfer primary ownership before leaving. Support Associates cannot open the Members page, so they ask an Owner to remove them. Only the primary owner can delete a workspace. After you leave or delete a workspace, you go to the workspace you still belong to. If you belong to more than one, or to none, you see the list of your workspaces, where you can also create a new one.
Last modified on November 1, 2026